Student import
Importing students allows a school to quickly add new students to its rolls, especially at the beginning of a new academic year when many new children enter Year 1. However, it is necessary to prepare the data correctly. In the following, instructions are given on how to organize the import of students in the most convenient way. Importing students is highly recommended when starting to use eKool or when starting a new school year when new students are added to the school.
The first line must have EXACT names with columns, also pay attention to upper and lower case letters:
- mandatory fields:
- name1 - firstname
- name2 - lastname
- idCode - personal identification number
- If desired, you can add to the import:
- class - class number
- parallelId - parallel sign
- gender - Allowed values are M (boys) and F (girls).
- street - address
- city - address city, village, parish
- county address county
- postalIndex - note thet the "small" l and the "big" I are next to each other
- phoneArea -phone area code
- phone -phone number
- studentNumber - student number in the student book
You can create an xml file from the table if you have added the necessary rules to your table. eKool offers them in two variants:
- .jar file required for open source OpenOffice and LibreOffice
- Google Sheets (via extension)
OpenOffice: student import preparation
1.Log in to eKool and open the Schoolyear page
2.Select any class and press +(plus) 
3.Select Import students (class). The import form opens.
4.Select OpenOffice export. The file eKool_import.jar (the file containing the rules for creating a xml file)will be downloaded to your computer.
6. Open Tools and press XML Filter Settings...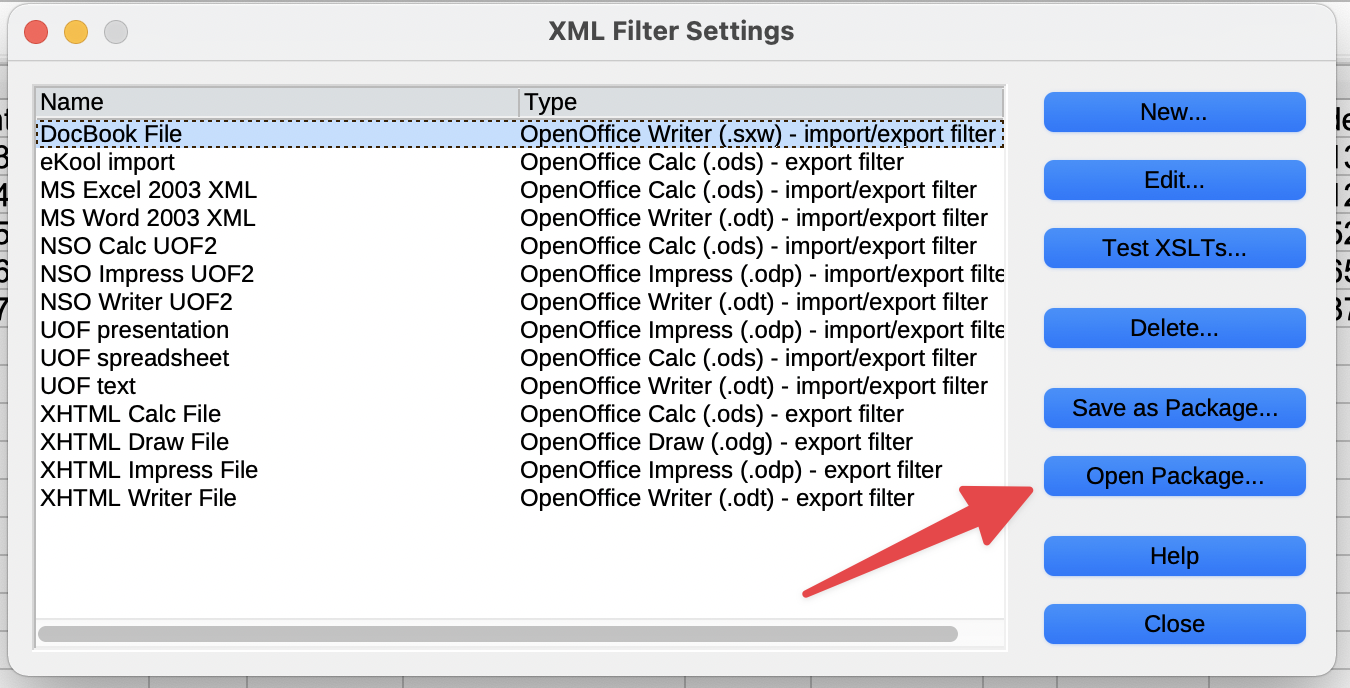
7. Find the downloaded eKool_import.jar file on your computer and press Open.
8. When you open this window again, you will see the eKool student data filter.
Preparing the import file
Create a suitable *.xml fail for eKool based on your table:
- Open a file in an OpenOffice table with the field names in the required form in the first row and the data of the new students.
- On the OpenOffice desktop, select File -> Export
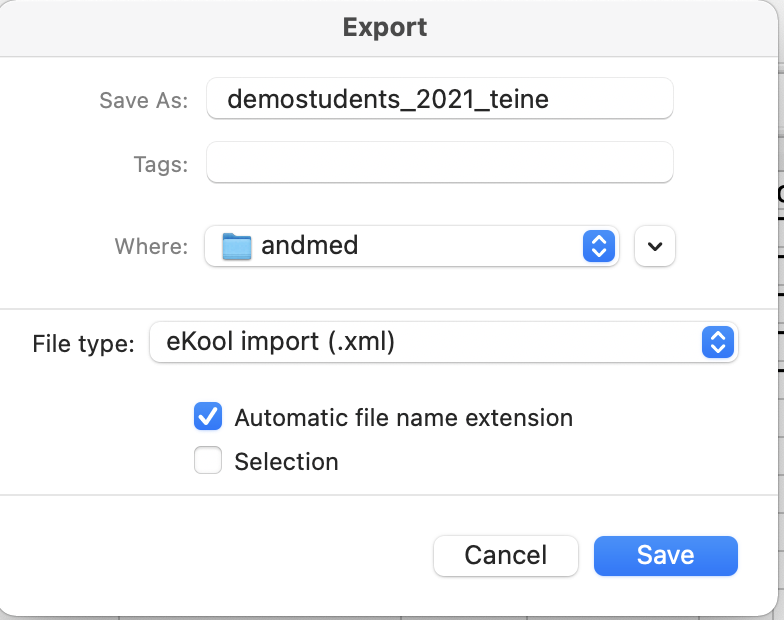
- Enter or edit the Fail name and select a Location
- If the File type content is not eKool import (*.xml), then select it form the list
- Press Save
- It is good to review the resulting file with an XML Editor (many freeware option) or with the simplest text editors (like Notepad). Text processing programns are not suitable, they add information that violates this when saving to the xml file.
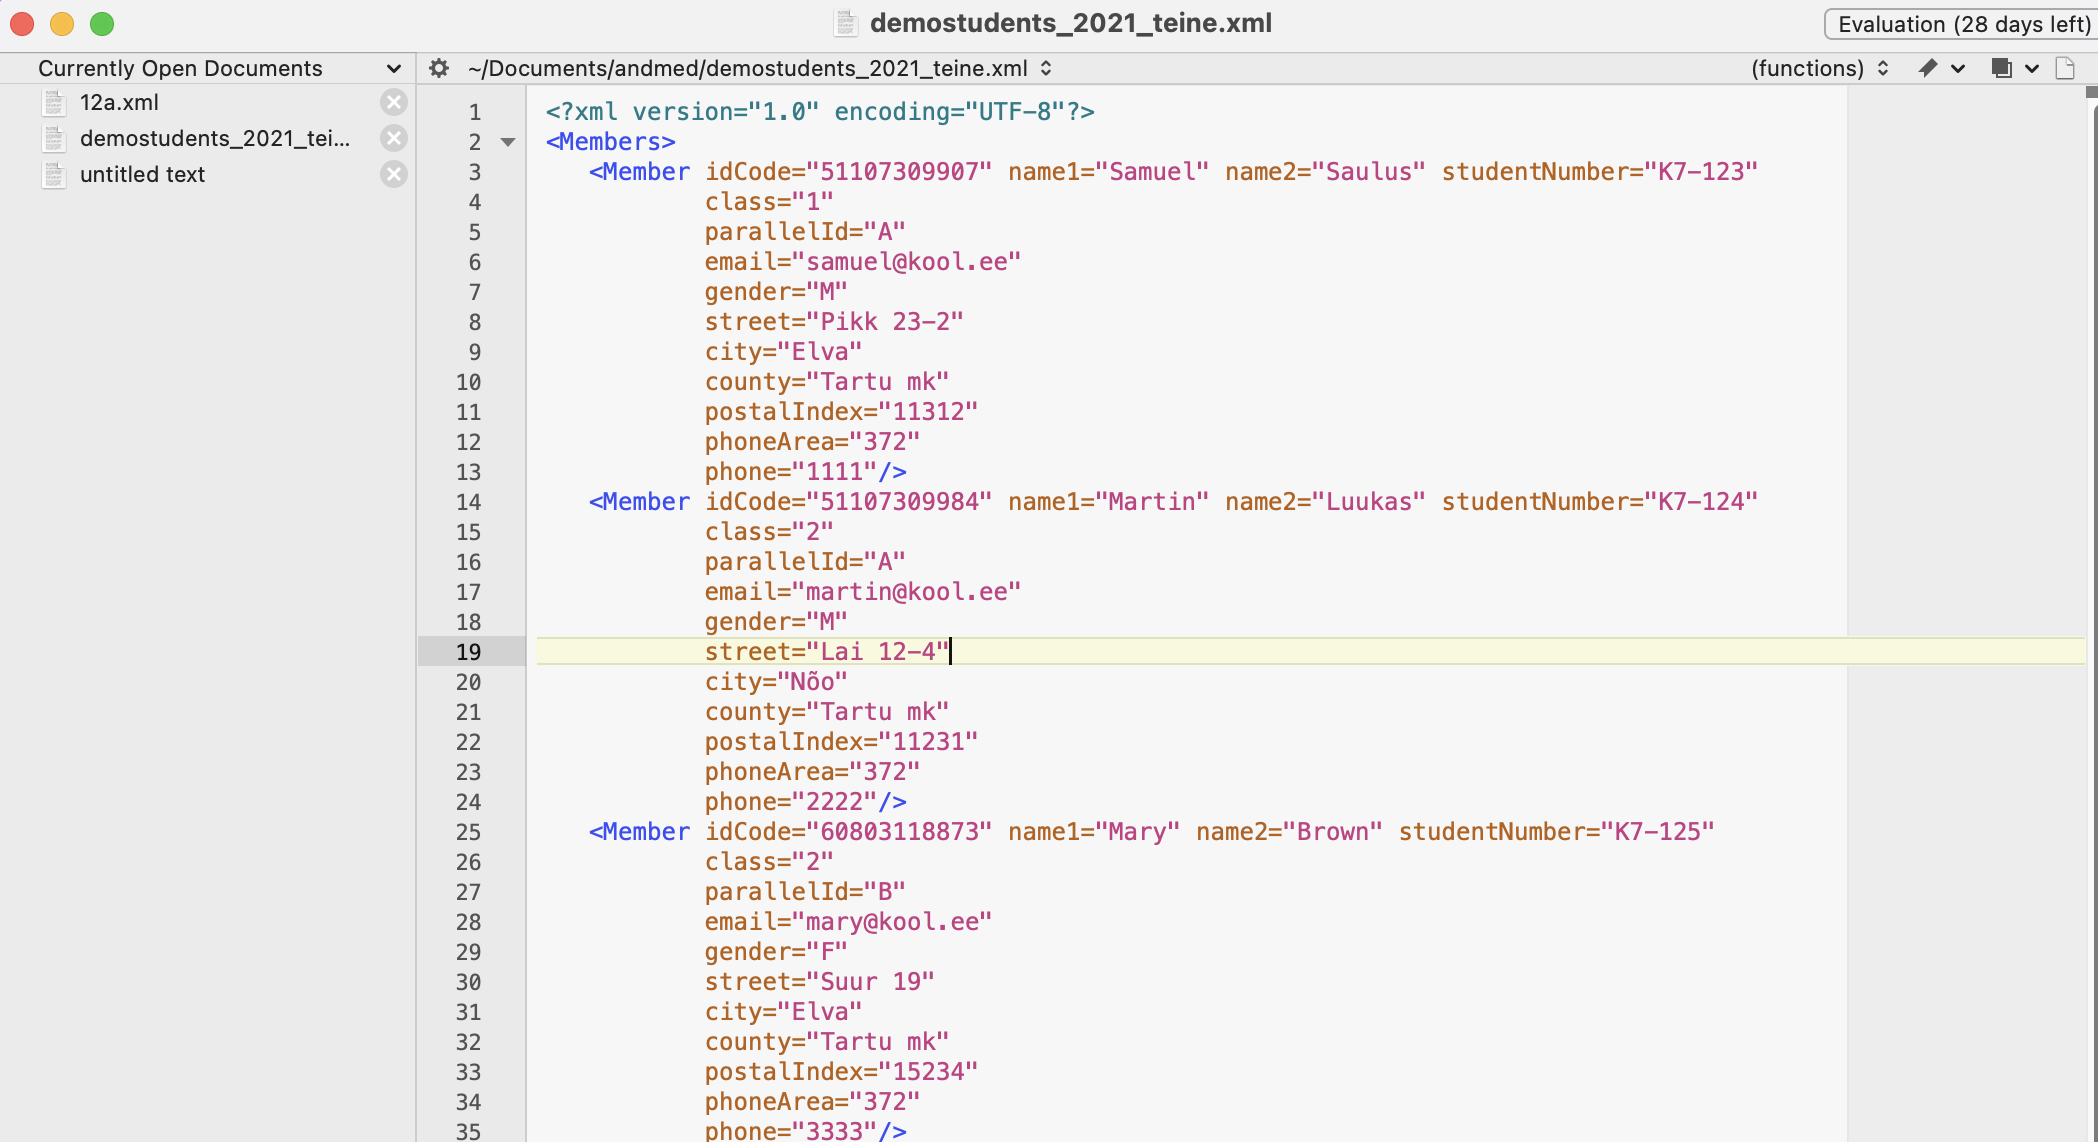
- Look out for empty fields, check tahat there are no empty lines at the end of the file.
Now you have a file with which you can quickly enroll new students in your school.
DeleteGoogle Sheets: student import preparation
Enter student data in the table. If you want to create a table in Google spreadsheet, please note that in the first column, the first cell must be left blank, and the word "Member" must be entered in each subsequent column, this must be done in order for the xml file to be exported correctly.

If there is a wish, it is possible to use the given example.
1. Log in to eKool and open the Schoolyear page
2. Select any class and press +(plus)

3.Select Import Students (class). The import form opens.
4. Select an example of a Google Spreadsheet table if you like to. An example opens on a new tab, where you can copy the content into your own table.
Preparing the import file
1. In order to export an xml file from a spreadsheet, you need to install an extension. To do this, press the Extensions button at the top of the menu and navigate to the Get Add-ons button.
2. A new window will appear, where you write "Export Sheet Data" in the search box.

3. Select an extension with such an image and install it.
.png)
4. After installation, find extensions again in the spreadsheet menu and you will see that the “Export Sheet Data” plugin has been added. Click on it and select “Open sidebar”. You will get an additional bar next to the document
5. Check these boxes:
- Export Format, Folder, Export Sheet(s)
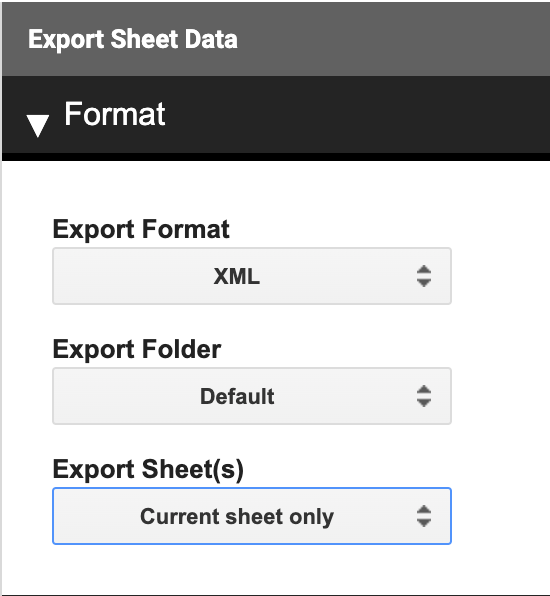
- In the root element cell, write the word "Members"
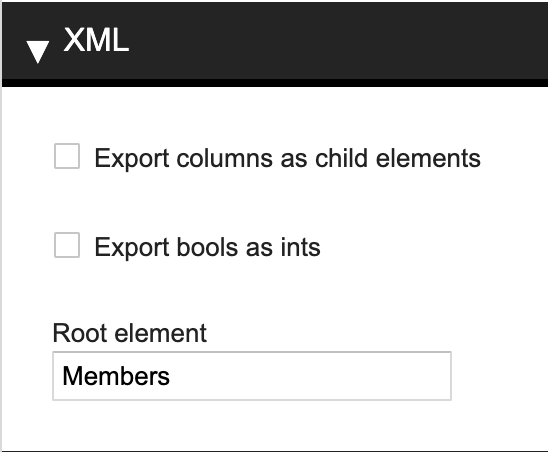
- Include XML declaration (Make sure that the cells are filled in correctly, as shown in the picture)
.png)
6.The finished file should be reviewed to ensure that it is exported in the correct format. The same plugin can be used for this. There is a Visualize button on the sidebar, press the button and see if the given document is compiled in the same way as the image.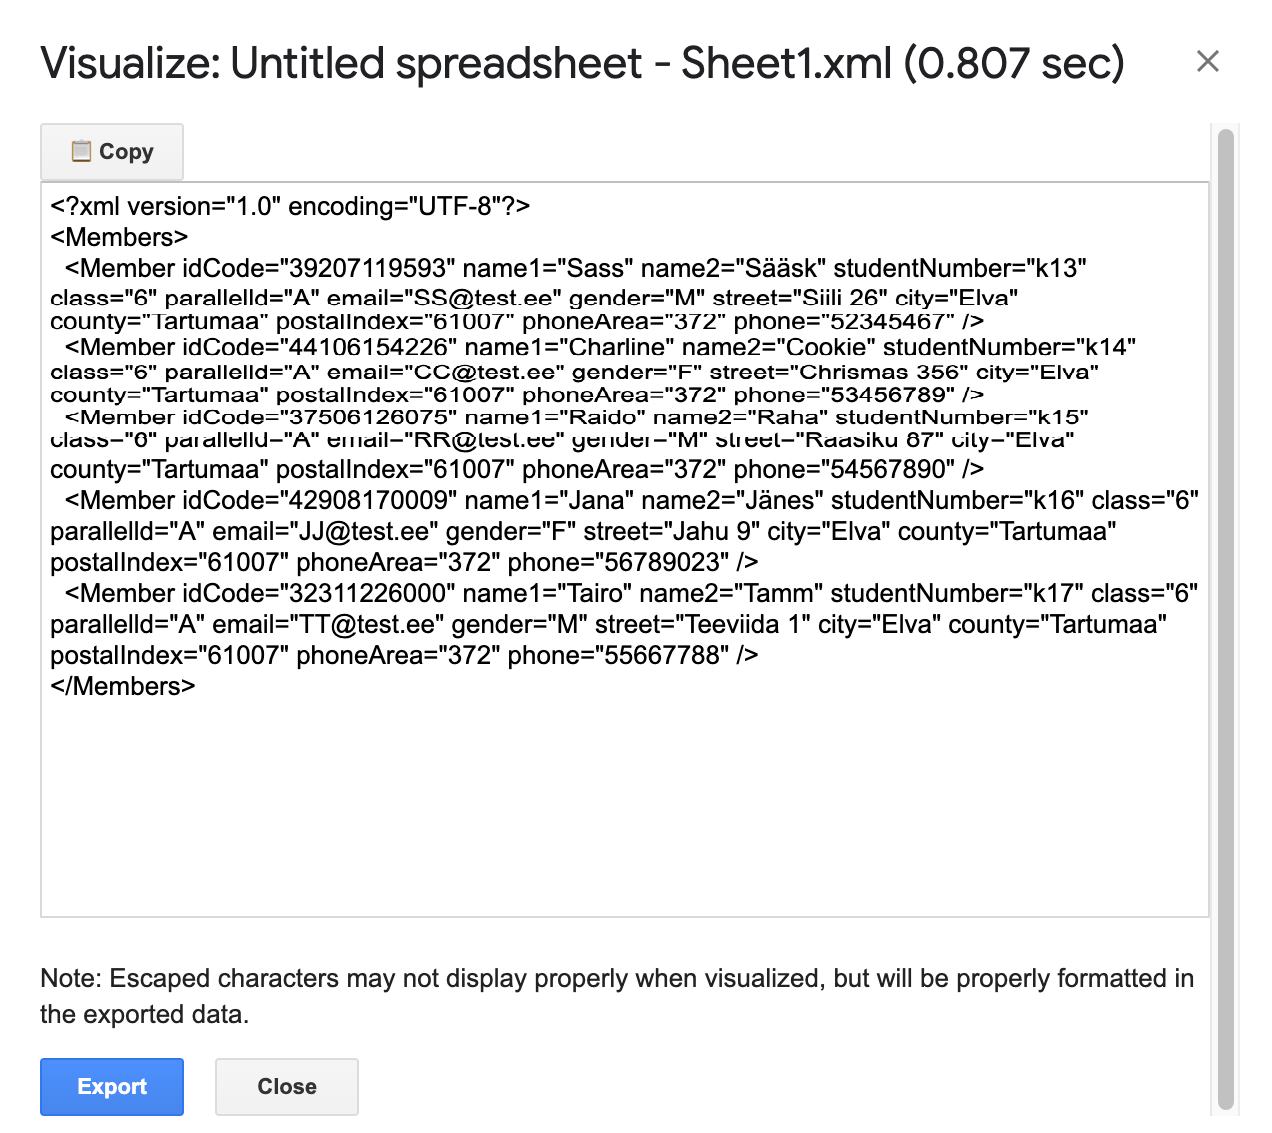 It is important that there is a declaration at the top and the Members and Member cells as shown.
7. If everything is checked and there are no errors, you can press export in this window. It will take a bit of time!
9. Download it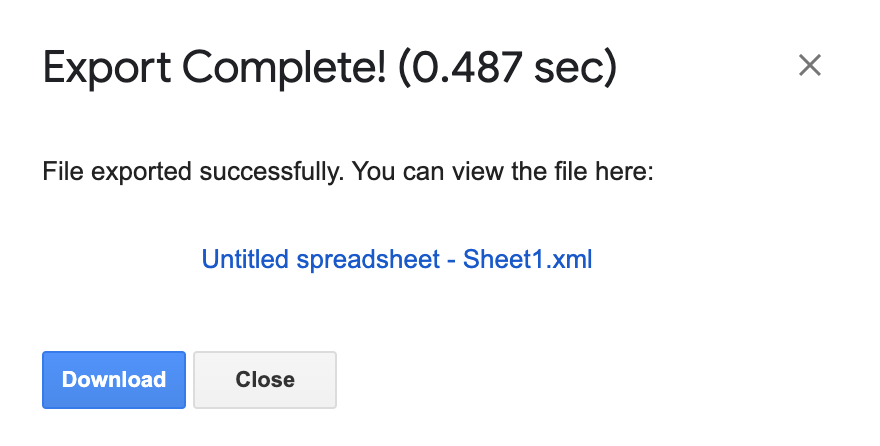
By pressing the Download button, it will lead to a new window, where permission must be given to download.
Now you have a file with which you can quickly enroll new students in your school.
DeleteStudent import to eKool
For Student import:
1. select Schoolyear from the school page, a list of students grouped by study programs and classes opens.
2. Select Schoolyear - by default, the current academic year is open. If you import next year's students before the actual start of this year, you must definitely change the year!
3. Select the correct curriculum and class to which you want to import students. If a class (class) is added to the import file and parallel (parallelId), you only need to choose the right curriculum.
4. Pressing + (plus) and select Import students (class) opens the import management window. 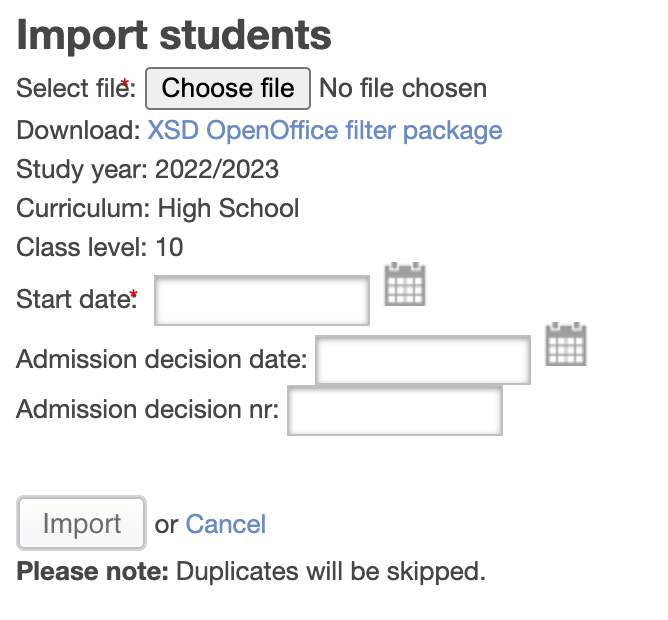
5. Select the required XML file.
6. Please note that the school year and curriculum and the class into which you are importing data are displayed for you to check. Unfortunately, this information is not designed in a straightforward way, so a mistake made in choosing the place of import may go unnoticed.
7. When importing, there is a mandatory field Start date, which you can write manually or enter using the calendar. For the 1st grade of the new school year, it is reasonable to add September 1st as the start date.
8. In addition, you can also enter the date of the Admission decision date and Admission decision nr:. Both the date of the start of studies and the data of acceptance are entered in the student book.
9. Import uploads student data to eKool.
The number of successfully imported students is displayed. If there is an error in any student's data, you will receive an error message.
You can import as many times as you want, even in the same class - repeating students will be skipped, their information will not be overwritten. When you import repeat students, you get information about who they are.
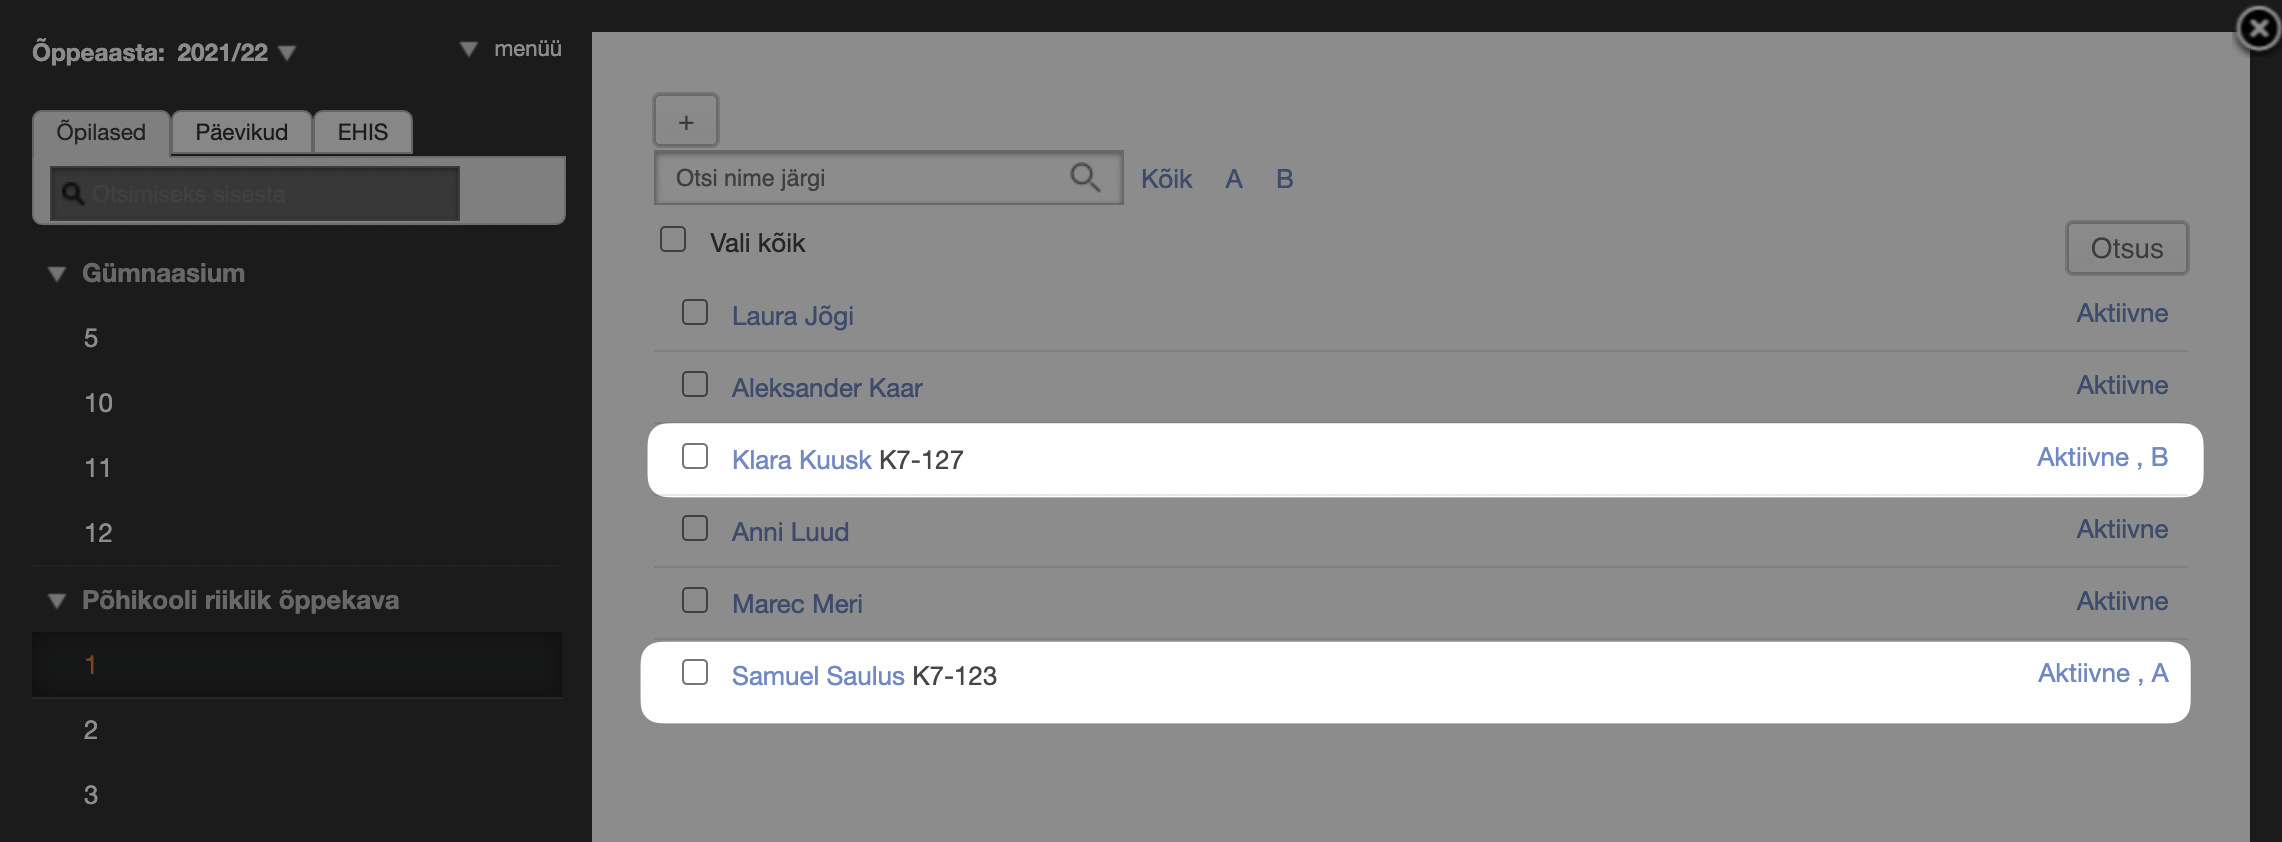
10. You can see the imported students in the class lists.
Video instructions
Summary
Importing students to eKool is the fastest way to get new children on the list before the new school year. Since this activity has to be done rarely (once or twice a school year) and there are many ways to go wrong, please read the instructions and check the following activities before each step.
